A black monitor does not identify its own cause. The display may have lost power, selected the wrong input, stopped receiving a usable signal, or developed a fault. The computer might also be sleeping, sending output to another screen, or trying a mode the connection cannot carry reliably. Replacing the monitor immediately can leave the original problem in place if the actual cause is a cable or dock.
This guide uses a controlled sequence for an external monitor connected to a desktop or laptop. You will record the symptom, simplify the connection, and compare results without changing several settings at once. Keep a working display available when possible so you can inspect computer settings safely. If you see damaged power wiring, smell burning, or notice liquid intrusion, stop using the equipment and arrange appropriate service. Ordinary signal troubleshooting does not require opening a monitor or touching its internal power circuitry.
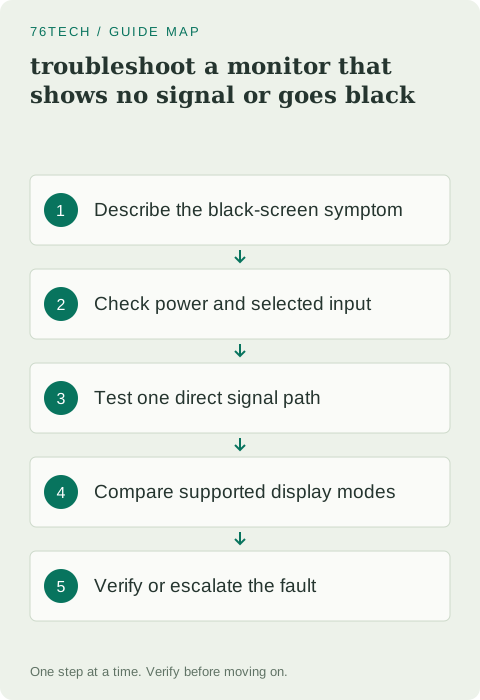
Describe exactly what the display is doing
Begin with the visible evidence. Is the power indicator off, steady, or blinking? Can you open the monitor's own menu? Does it display a no-signal message, briefly show the desktop, or remain completely dark? Write down those observations before reconnecting everything. Different symptoms suggest different starting points.
Record when the problem occurs. A display that never shows an image differs from one that fails after waking from sleep or during a video call. Note whether the laptop's internal screen continues working and whether sound or keyboard response suggests the computer is still active. These details help distinguish a display-path failure from a computer that stopped responding entirely.
Keep the description neutral. “The screen turns black for two seconds when I start the game” is more useful than “the graphics card is broken.” Your first task is to make the behavior reproducible and observable. A suspected cause should remain a hypothesis until a comparison supports it, especially when several devices share the same dock or power strip.
Separate power from incoming video
Check the monitor's power connection and the outlet or power strip it uses. Confirm that the power button is actually on and that any external power adapter belongs to the model. Do not substitute an adapter solely because its plug fits. Voltage, polarity, and supported output requirements matter, and the manufacturer's specified adapter is the appropriate reference.
Try opening the on-screen menu using the monitor's controls. If the menu appears clearly, you have evidence that the panel can display its own interface even though the computer image is missing. If no menu or status message appears, follow the model's documented power troubleshooting before spending time on desktop resolution settings.
Avoid repeatedly cycling power without recording whether anything changes. A deliberate test has a question and an observable result. For example, using a known working outlet answers whether the original outlet or strip may be involved. It does not establish that the monitor's video input is healthy. Keep those conclusions separate so the next step addresses the unresolved part of the system.
Confirm the selected input and the actual ports
A monitor with HDMI, DisplayPort, and USB-C inputs may be waiting on a different connector from the one you are using. Open its input menu and select the port that matches the connected cable. Check the printed labels rather than relying on where a connector happens to sit on the back of the display.
On a desktop with a discrete graphics card, identify which connectors belong to that card and which belong to the motherboard. The available output depends on the computer's configuration. Connecting a cable to a motherboard port does not guarantee usable video when that output is unavailable or disabled. Consult the computer documentation if you are unsure about the intended connection.
For a laptop, confirm that the chosen USB-C port supports the display function you need. A connector's shape does not establish its capabilities. Record the port, cable, and monitor input as a complete path. This simple inventory prevents repeated tests where the user changes an input setting while the cable remains attached to a different socket.
Reduce the setup to one direct connection
Disconnect additional displays and simplify the video path. If practical and supported, connect the monitor directly to the computer using one known suitable cable. Temporarily remove a hub, dock, adapter chain, or switch from the path. Keep the original arrangement documented so you can put it back after the comparison.
This test answers whether the display works through the simpler route. If it does, the removed equipment or its configuration deserves attention. It does not immediately prove that the dock is defective; the original route might require a different cable, power supply, supported mode, or driver. Use the successful direct connection as a baseline rather than a final diagnosis.
Choose a stable placement for the cable and devices. A connector under tension can make a test inconsistent. Avoid pulling on the cable while watching for a flicker, because movement can introduce a new physical problem. A repeatable setup helps you separate the original symptom from changes caused by handling the equipment during troubleshooting.
Compare cables without assuming they are equivalent
A damaged or unsuitable cable can carry some modes successfully and fail with others. Replace it temporarily with a known working cable appropriate for the same connection and intended mode. Keep the monitor input and computer port unchanged during this comparison so that the cable is the main variable.
Inspect connectors for obvious damage and debris without forcing them or using an improvised metal tool. If the fit is unusually loose or a connector has bent contacts, stop using that component. A cable that worked on a different system is useful evidence, but the other setup may have used a lower resolution or refresh rate.
Label the cables you test and record the result. “Cable A works at the ordinary desktop mode; Cable B produces intermittent blanking” is actionable. “I tried several cables” is harder to interpret when nobody remembers which ports or settings were used. The purpose of substitution is to narrow the uncertainty, not to produce a pile of disconnected accessories.
Check display settings through a working screen
When another screen is available, inspect the operating system's display configuration. Confirm whether the external monitor is detected and whether the chosen arrangement actually uses it. A detected display can still be configured in an unexpected position, and an application window may appear outside the screen you are watching.
Choose a resolution and refresh rate explicitly supported by the monitor and the complete connection path. Begin with an ordinary documented mode rather than the highest available option. If a recent change triggered the problem, use the operating system's supported recovery or reversion process and consult its display guidance. Do not invent a custom timing as an initial repair.
Keep text scaling separate from signal stability. Scaling changes how large interface elements appear; it is not a substitute for selecting a supported video mode. After each adjustment, observe the screen long enough to determine whether the original blanking returns. Record the exact setting that changed so you can explain why the result differs from the baseline.
Investigate a dock as a complete system
If the display works directly but fails through a dock, inspect the dock's supported display combinations. The number of connected screens, their modes, the host port, and the dock's technology all affect the result. Read the documentation for the exact model instead of borrowing a capability claim from a similar-looking product.
Confirm that the dock has its required power supply and that its host cable is the intended one. Then reconnect one display at a time. A stable single-display result gives you a useful checkpoint before adding a second screen or increasing the refresh rate. Keep unrelated USB devices unchanged unless you are testing whether one of them affects the problem.
If the manufacturer documents a driver or firmware requirement, review it and follow the supported update process. Do not install several display utilities from unrelated vendors in an attempt to make the dock respond. A clear device inventory and a staged test make it easier to identify whether the limitation is configuration, compatibility, or a hardware fault.
Use the monitor's documented self-test
Some monitors provide a built-in diagnostic or self-test that displays patterns without relying on the computer's desktop output. Consult the manual for your model before attempting button combinations. Different products use different procedures, and a no-signal status message is not necessarily the same as a full panel diagnostic.
Dell's monitor diagnostic guide explains how supported models can help isolate display faults. Follow your manufacturer's corresponding instructions. Observe whether lines, flicker, dark areas, or other abnormalities also appear during the independent test.
If the same visible defect occurs in the built-in diagnostic, you have stronger evidence for a problem within the monitor. If the patterns are clean, return to the computer and connection path. A successful self-test narrows the investigation, but it does not prove that every input port and every supported mode works. Record precisely which test was performed and what it showed.
Compare another display or another computer
A second known working display can help test the computer's output, while another compatible computer can help test the monitor's input. Choose one comparison and preserve the conditions you can. Use supported modes and a known suitable cable rather than combining a new computer, unfamiliar adapter, and different input all at once.
Interpret the result within its limits. If the monitor works with another computer through the same cable and input, that route is capable of producing an image. The first computer's settings, output, or software now deserve closer attention. If the original computer works with another monitor, the first monitor or its compatibility with that path remains relevant.
Write the comparisons as a small test record with device names and outcomes. This is especially useful when requesting support because it demonstrates what was isolated. Avoid declaring a component failed from a comparison that changed too many variables. A second test should clarify a remaining question, not simply repeat the same uncertain setup with different labels.
Verify sleep, wake, and ordinary use before closing the case
A recovered picture is only the first checkpoint when the original problem was intermittent. Test the action that triggered it: wake the machine, connect the dock, start the application, or switch the monitor input. Use the same ordinary workload and observe whether the failure returns under those conditions.
Check that the final arrangement remains usable after a normal restart and that windows appear on the intended screens. Reconnect removed equipment gradually, recording each change. If the problem returns after adding one device or increasing a mode, keep that relationship in your notes. It gives you a more specific next question than the original statement that the monitor sometimes goes black.
Prepare a support summary if the fault remains. Include the exact model, connection path, supported mode, power and menu observations, cable comparisons, and self-test result. A concise evidence record helps the manufacturer decide what to investigate. It also protects you from replacing an expensive component merely because it was the most visible part of a system whose actual failure was elsewhere.