A graphics-card upgrade can expose a power-supply question that was easy to ignore while the computer worked. The new card needs particular connectors, the case has limited clearance, and the existing supply's advertised wattage does not answer every compatibility question. A careful check before purchasing is easier than improvising after the parts arrive.
This guide is about planning and documented replacement, not repairing a power supply internally. Do not open its enclosure. If the device shows damage, a burning smell, or other signs of an electrical fault, stop using it and seek qualified service rather than continuing tests under load.
1. Identify the existing system
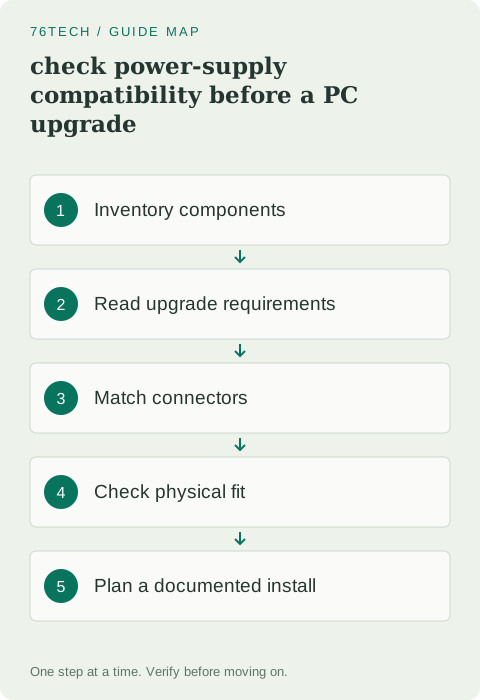
Record the power-supply model, computer or case model, processor, graphics card, storage devices, and relevant expansion hardware. For a prebuilt computer, find the manufacturer's upgrade specifications. Some systems use proprietary shapes or connectors that differ from standard retail components.
Look at the label and documentation without disassembling the supply. A brand name and a remembered capacity are not enough. Exact model information helps establish connector availability, physical dimensions, and supported operating conditions. If the label is inaccessible, use the system's original specification or contact its support channel.
2. Read the upgraded component's requirements
Check the new component manufacturer's power recommendations and required connector arrangement. A recommended system power figure is a planning input, not a complete calculation of every possible workload. Consider the whole system and the supply's documented capabilities rather than the graphics card in isolation.
Avoid assuming that a larger number on the box guarantees suitability. Quality, connector support, protection features, and the intended workload matter too. Use a reputable manufacturer's current specifications and the computer's compatibility guidance. Do not base a significant upgrade on an anonymous list that does not identify the exact parts.
3. Match the connectors without improvising
Identify the required motherboard, processor, graphics, and storage power connectors. Similar-looking connectors can serve different purposes, and a cable reaching the component does not establish that it belongs there. Consult the manuals and labels for both the supply and target device.
For modern graphics connectors, follow the card and supply manufacturer's seating and cable-routing guidance. Avoid excessive bending or strain near a connector. If an adapter is officially required, use the supported arrangement and understand its input requirements. Do not add an unknown adapter merely to convert a shortage of connectors into an apparent fit.
4. Treat modular cables as model-specific
Modular power-supply cables are not universally interchangeable at the supply end. Keep the cables supplied or explicitly approved for the exact model. A connector that physically fits another supply can still have a different electrical arrangement.
Corsair documents cable compatibility in its power-supply cable guidance. Use the corresponding information for your manufacturer and exact model. When replacing a modular supply, do not leave old cables installed simply because removing them is inconvenient. Verify every cable's approved compatibility before reuse.
5. Check the enclosure and airflow
Confirm the supply's form factor, length, mounting points, and space for attached cables. A unit can meet electrical requirements and still conflict with a drive cage or a compact case. Measure according to the case manufacturer's information rather than assuming that every nominally similar form factor has identical clearance.
Check the intended intake orientation and available ventilation. Keep the installation consistent with the case and supply instructions. A fan pointed toward a blocked surface may undermine cooling. Cable routing should also avoid obstructing fans or creating pressure against removable panels.
6. Plan the work before disconnecting anything
Back up important files, save the hardware manuals, and photograph the current cable arrangement. Label connections if that helps you follow the documented replacement procedure. Shut down and disconnect external power before servicing, using appropriate precautions for the computer's components.
If the system is proprietary, under an applicable service arrangement, or unfamiliar, ask the manufacturer or a qualified technician about the upgrade. Planning includes recognizing when the procedure is outside your experience. An accessible-looking component is not a reason to improvise around unknown wiring.
7. Inspect the completed installation deliberately
Before applying power, check every intended connection against the manuals. Look for partially seated plugs, cables near fan blades, and unused loose hardware. Ensure that the enclosure is reassembled as required and that no connector is being held at an angle by cable tension.
Start with a normal boot and basic operation. Do not begin with a maximum-load stress test on a setup you have not inspected. If the system does not start or behaves abnormally, shut down and revisit the documented connections. Repeated attempts without investigation can make a wiring problem more consequential.
8. Validate the real upgrade and keep records
Run a representative workload after basic operation is stable and watch for unexpected resets or other symptoms. Such symptoms do not identify the supply automatically; they are a reason to investigate the whole installation. Keep the old parts available where appropriate until the new setup is confirmed and return arrangements are understood.
Record the supply model, approved cable set, and upgraded component. The next maintenance session becomes much easier when compatibility is documented instead of remembered. A dependable power plan comes from the correct components and connections, with enough physical and electrical suitability for the actual system—not from wattage alone.