Welcome to the Android Studio course. You will build Field Notes, a small Android app that records the things you learn. It begins with a welcome screen and grows into a note editor with navigation, local storage, and an optional network feed. A modest project is useful because you can understand every decision instead of copying a large application whose behavior remains a mystery.
This first lesson is about getting a dependable feedback loop: edit, build, run, observe. You do not need to understand every generated file today. You do need to know which application you are running, where errors appear, and how to make one visible change. Later lessons assume this loop works, so spend time resolving setup problems before adding features.
Check your computer before downloading
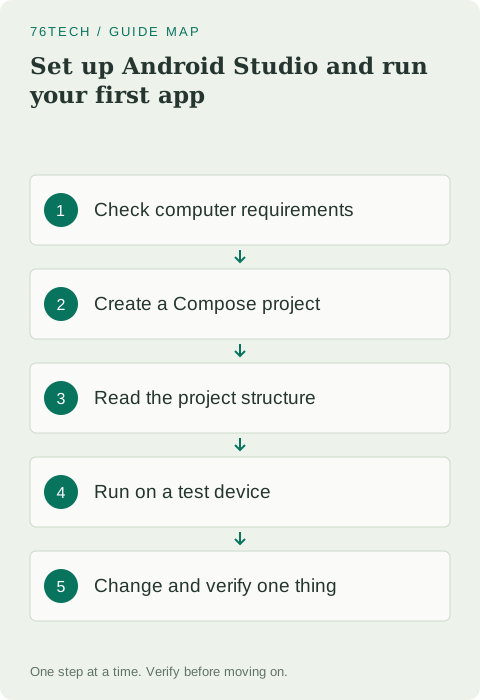
Read the current Android Studio installation requirements for your operating system. The emulator needs additional resources beyond the editor itself, and virtualization support matters on machines that run virtual Android devices. Leave room for SDK packages, emulator images, build caches, and your own projects. These downloads can occupy much more space than the initial installer suggests.
Use the stable Android Studio release from the official Android Developers website. A stable channel reduces avoidable variation while learning. Keep the installer and setup choices consistent with the official guide for your platform; do not solve a setup problem by downloading unknown SDK bundles. If your computer struggles with an emulator, a compatible physical Android phone may offer a more practical test device.
Create the smallest Compose project
In the new-project flow, choose the template described as an empty Jetpack Compose activity. Template labels can vary between Studio versions, so inspect the description rather than selecting a similarly named Views template accidentally. Name the app Field Notes and use Kotlin. Choose a package identifier you control for your practice project, such as com.example.fieldnotes while learning.
Keep the generated minimum SDK and compatible build configuration unless your exercise requires a different choice. The minimum SDK describes the oldest Android API level the app supports; the target SDK expresses the platform behavior level it targets. Neither number is your phone model. Avoid changing several Gradle or SDK versions at once simply because an online screenshot uses different values.
Wait for a clean initial synchronization
Android Studio uses Gradle to configure and build the project. The first synchronization may download dependencies and take longer than later runs. Let it finish and inspect the result before editing. A network interruption or missing SDK package can cause a failure even when the generated Kotlin code is perfectly valid.
If synchronization fails, find the first meaningful error in the build output. Check the requested package, network access, and the supported tooling combination. Do not paste unrelated Gradle fixes from several tutorials into the project. Keep the generated wrapper and the IDE's configured compatible JDK as your starting point, then change one documented setting at a time if the error requires it.
Read the files you will touch
The app module contains Kotlin source, Android resources, a manifest, and module-level build configuration. Your activity is an Android entry point; in a Compose template it normally calls setContent to describe the app's UI. A theme wraps the visible content and supplies consistent colors and typography. Resource files hold text and other assets that should not be scattered through the code.
Find the activity, the generated theme, and the string resource file. Also locate AndroidManifest.xml and the app module's build.gradle.kts. You do not need to edit every file. Write a short note describing their roles, because a later missing permission or dependency error belongs in a different place from a misspelled Kotlin function.
Run on an emulator or a physical phone
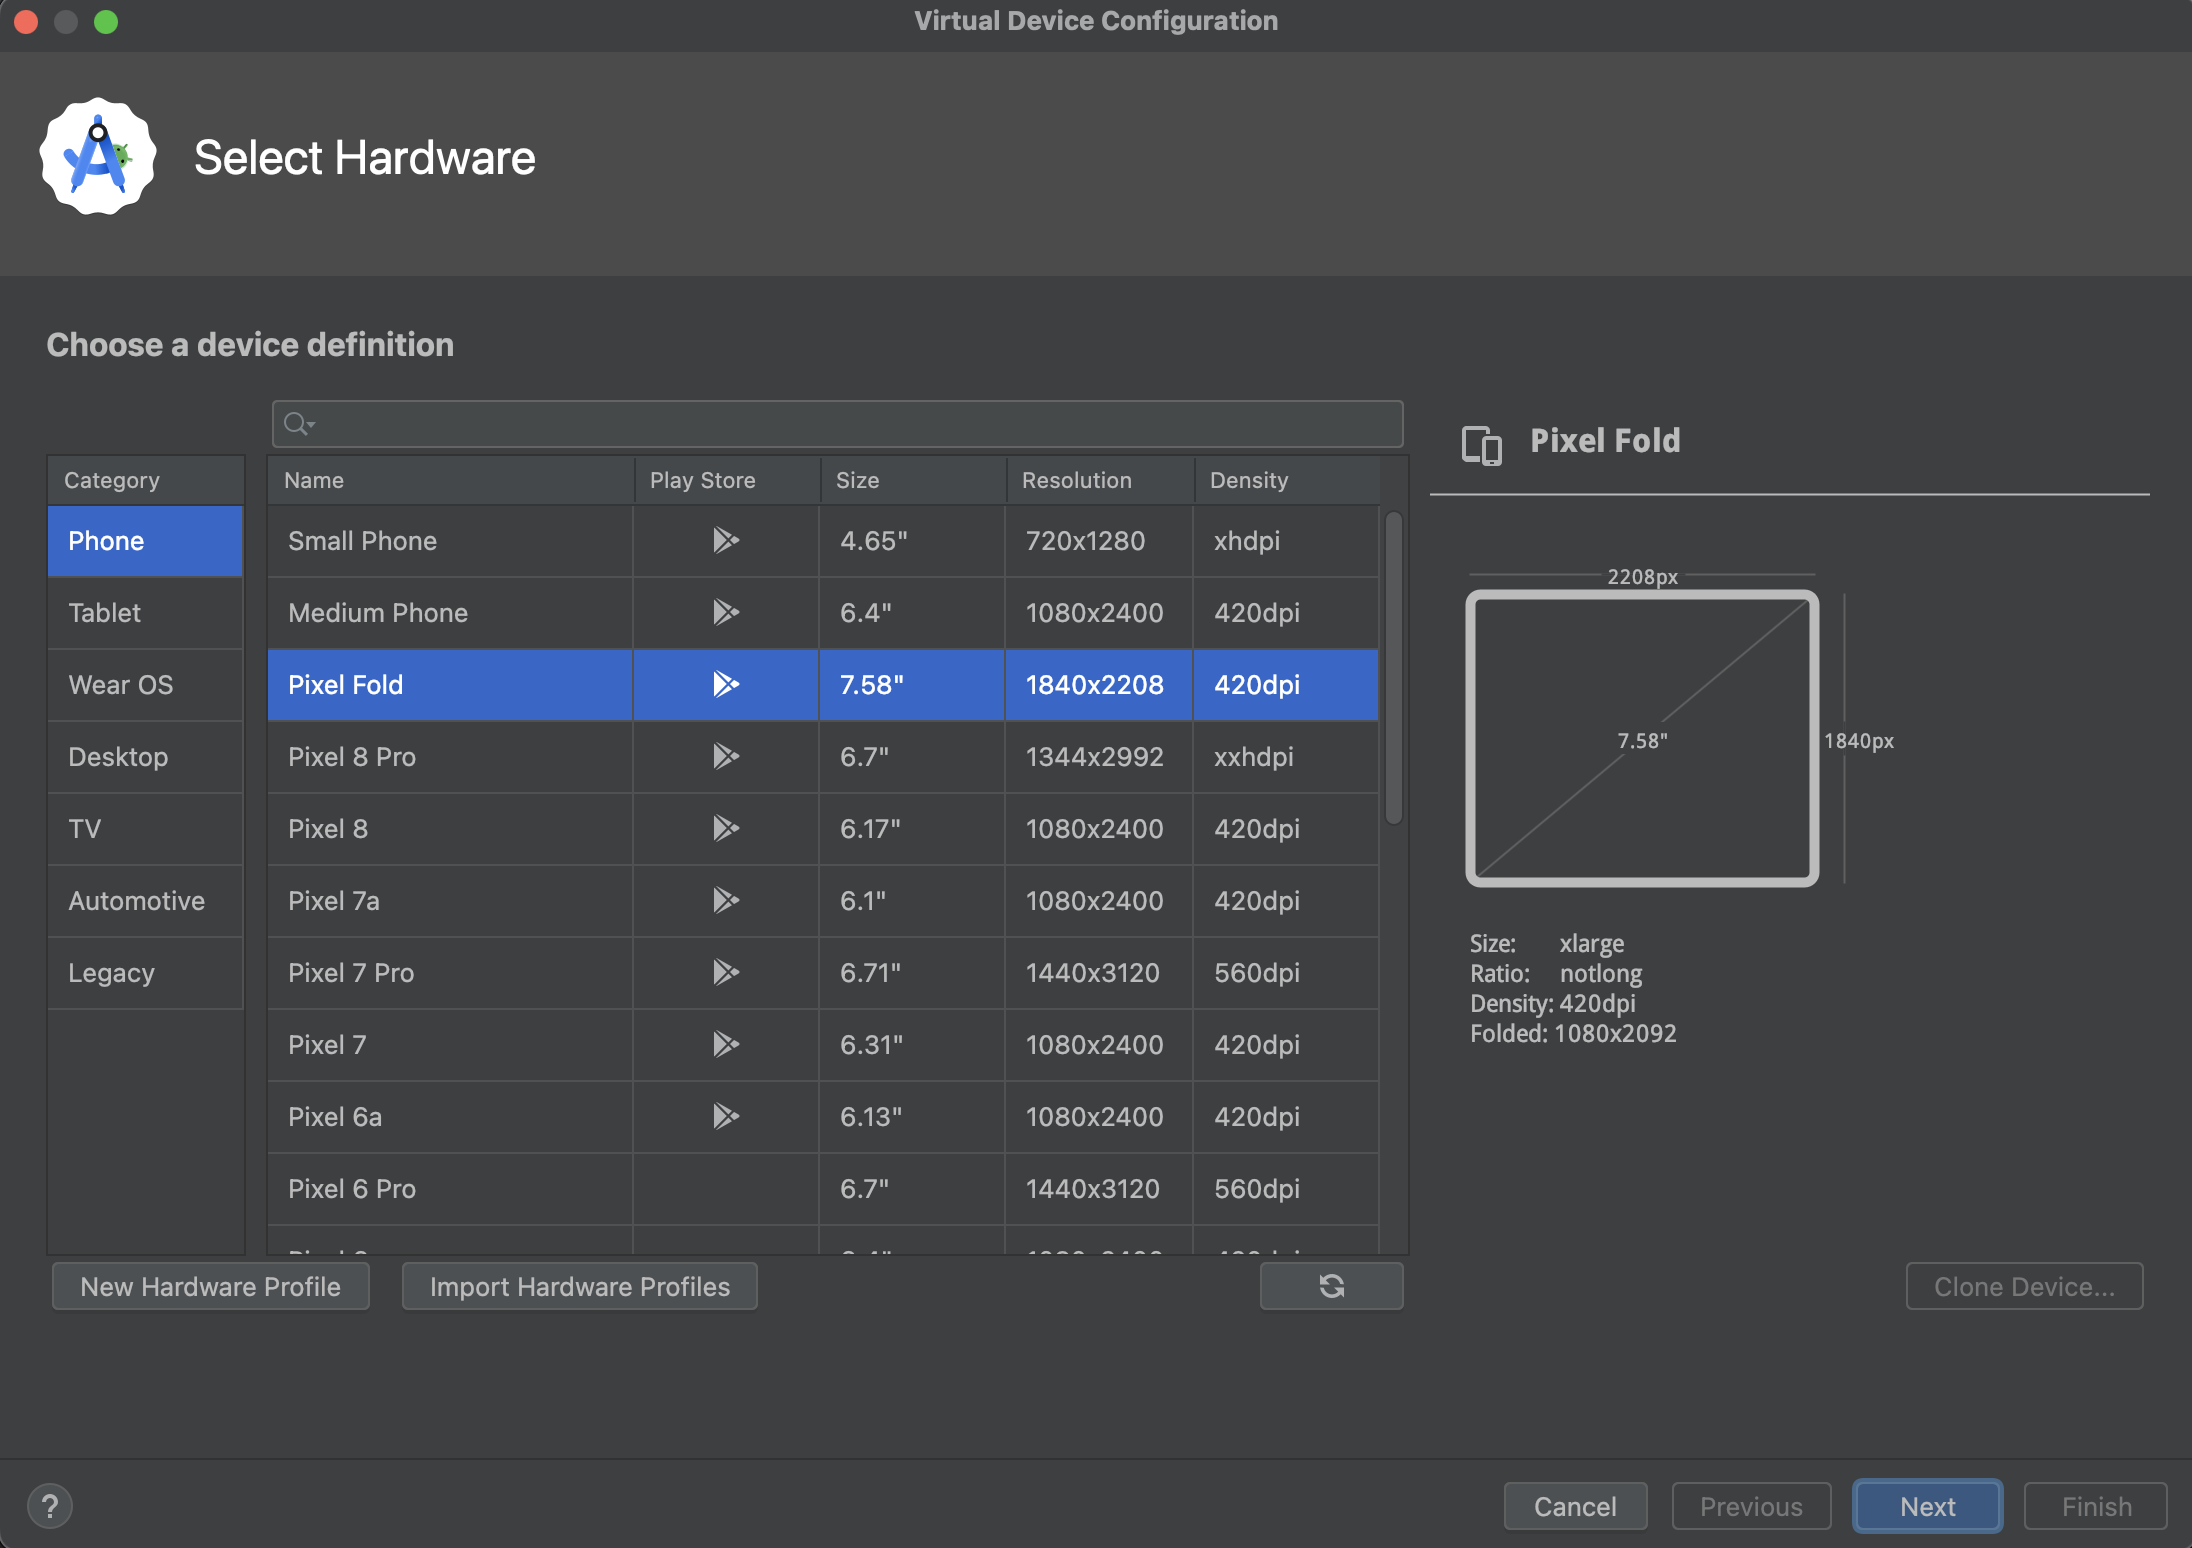
For an emulator, create a virtual device through Studio's device manager using a system image supported by the project. Start one device and wait for it to finish booting before running the app. A virtual device is a separate Android environment; its installed applications and settings are not the same as those on your development computer.
For a physical phone, follow the official device-debugging instructions. Enable the required developer setting and authorize debugging only for a computer you trust. A USB cable that charges correctly may still lack working data connections, so inspect Studio's device list. Select the intended device, run the app, and verify that the welcome screen actually appears there.
Make one change you can recognize
Find the template's greeting composable. Change only its displayed greeting or the argument used to generate that greeting. If your template has a function similar to the example below, replace its text with a resource-based message once you have verified the first edit. The snippet illustrates a composable body; keep the package, imports, theme, and activity from your own generated template.
@Composable
fun WelcomeMessage() {
    Text(text = "Welcome to Field Notes")
}
Call the function inside the existing theme in setContent, build, and run again. Seeing your distinct message confirms that you edited the project currently installed on the selected device. If the screen does not change, check the selected run configuration and device rather than making a second unrelated edit. A recognizable tiny change is a valuable diagnostic tool.
Separate the common failure layers
A Kotlin compilation error usually points to source code or imports. A Gradle synchronization error often concerns configuration or dependency resolution. A successful build followed by an installation failure concerns the device or package installation. A crash after launch is different again: inspect Logcat for your app's exception rather than guessing from the last screen you saw.
Save the complete relevant error message in your practice notes, along with the change that preceded it. Remove sensitive information before sharing logs. Avoid treating a clean rebuild or deleting caches as the answer to every problem. Those actions can hide useful evidence and consume time while leaving a wrong import, incompatible dependency, or device issue unchanged.
Complete your first checkpoint
Close and reopen the project, then run it again without changing its configuration. Explain aloud where the UI is defined and where you would look for a build error. Create a source-control checkpoint when the project works, excluding generated build outputs and keeping local machine configuration out of shared history as appropriate to the generated project.
Your exercise is to change the greeting a second time, predict what will happen, and verify it on the device. You are ready for Kotlin when you can repeat that cycle confidently. Consult the official installation guide and the Android Basics with Compose course for platform-specific setup details. Our next lesson turns the words on that screen into a small, understandable data model.