
Two-factor authentication adds another check to a login that would otherwise rely on a password alone. The setup can take only a few minutes, but the recovery plan deserves equal attention. A lost phone should not become a reason to abandon protection or lose access to an important account.
Begin with one account you control and whose sign-in process you understand. Use the service's own security settings and official help pages. Never start from an unexpected message asking you to scan a code or approve a login that you did not initiate.
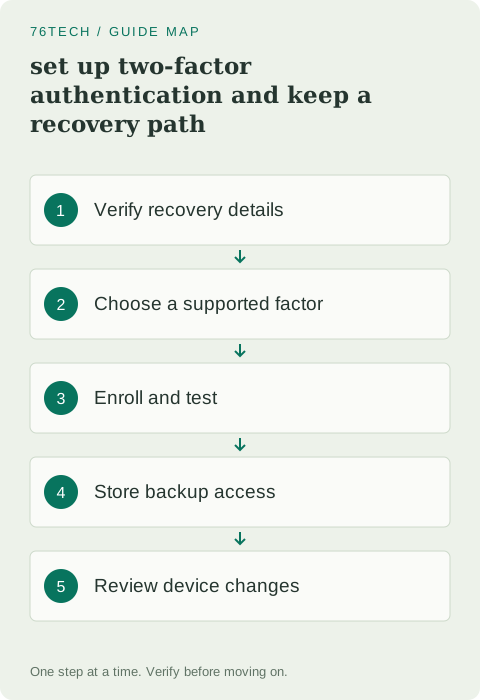
1. Check the account's recovery information
Before changing authentication, confirm that the recovery email address and phone number, where used, belong to you and are current. Verify that you can access the recovery email independently. An old work address or a phone number you no longer own can make later recovery much harder.
Keep an existing signed-in session open while enrolling a new factor, where the service allows it. That session can help you review settings if a test login fails. Do not immediately sign out every device before you have confirmed that the new method works.
2. Understand the methods the service supports
Common options include authenticator-generated codes, push approvals, security keys, and text messages. Passkeys may provide a different sign-in experience depending on the service. The available methods and recovery rules are specific to the account, so read the provider's explanation rather than assuming every “two-step” setting works identically.
CISA's MFA guidance explains the benefit of adding authentication beyond a password. For phishing-resistant options and exact enrollment behavior, use the provider's current security documentation. Choose a supported method you can maintain reliably and add an appropriate backup method when permitted.
3. Enroll from the genuine account settings
Navigate to the service using a known address or its official app. Open the account's security settings and follow its enrollment flow. If using an authenticator app, obtain it from its official distribution channel and understand whether it offers synchronization, export, or recovery.
A QR code used to enroll an authenticator can contain the secret needed to generate future codes. Do not post it in a help forum, include it in a public screenshot, or leave it in an ordinary shared folder. Treat the setup information as sensitive even though it looks like a convenient picture.
4. Verify the first code or key interaction
Complete the provider's verification step before assuming enrollment is finished. If a time-based code fails, check that the correct account entry is selected and that the device clock is set accurately. Avoid repeatedly creating new authenticator entries without knowing which one the service accepted.
For a security key or passkey, follow the device prompts and note where the credential is stored. A credential synchronized through an account and one stored only on a physical key have different recovery implications. Make the storage model part of your plan rather than discovering it after losing a device.
5. Store backup codes independently
If the service provides backup codes, save them securely in a location you can access if your primary device is unavailable. Depending on the service, a code may be single-use, and generating a replacement set may invalidate the old set. Label the account and date so you know which set is current.
Google documents its specific behavior in backup-code help. Other services may differ. Do not keep the only recovery copy on the same phone that holds the sole authenticator. A secure offline copy or another independent protected location can remove that single point of failure.
6. Test a fresh sign-in carefully
Use a separate browser session or another trusted device to test the normal login. Confirm that the password and new factor work together. Keep the original session available until the test succeeds, and avoid using a public or untrusted computer for the exercise.
If you decide to test a backup code, read the provider's instructions first and mark a consumed code accordingly. Do not repeatedly test recovery flows just to see what happens; some flows can revoke sessions or change security state. The objective is confidence in the documented process, not unnecessary account churn.
7. Prepare before replacing a phone
Before wiping or trading in a phone, transfer or re-enroll authentication using each provider's supported method. Check important accounts individually from the replacement device. An authenticator app appearing on the new phone does not prove that all account secrets or device-bound credentials transferred.
Only remove the old factor after the replacement and recovery methods have been verified. Also review old trusted devices and sessions through the account's security controls. Keep the process orderly: add, test, then retire. Doing those steps in reverse can create an avoidable lockout.
8. Respond thoughtfully to unexpected prompts
Do not approve a push notification for a sign-in you did not start, and do not share one-time codes with someone claiming to be support. Open the service directly to inspect account activity if something looks wrong. Repeated unexpected prompts deserve investigation rather than approval to make them stop.
Once the setup works, record which method and recovery route each important account uses without recording secret codes in an unsecured checklist. Revisit that inventory when devices, phone numbers, or recovery email addresses change. Strong authentication works best when the ordinary login and the exceptional recovery process are both understood.