
A recovery plan is easiest to build while the computer still works. Once Windows will not start, even simple tasks become harder: finding the device model, locating an encryption recovery key, or remembering which folders were backed up. Preparation turns those questions into a short checklist you can read from another device.
The plan should protect your data and help you choose an appropriate recovery route. It does not need to predict every possible failure. Start with what you must regain: important files, account access, and the applications required to continue work.
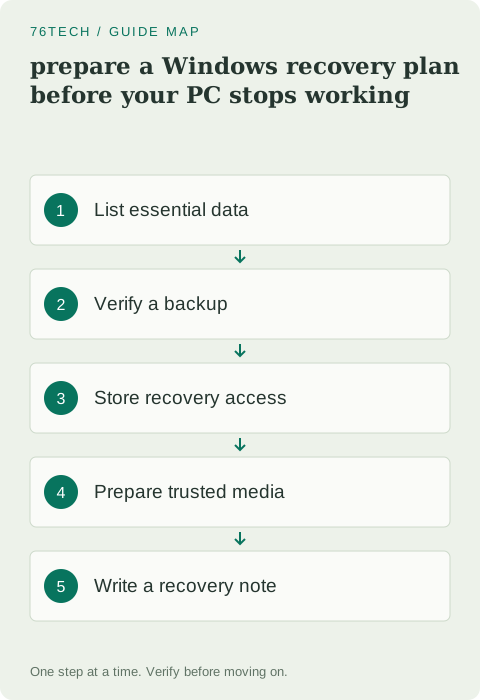
1. Inventory the things that matter
List your important data locations, including project folders outside Documents, local email archives, specialist application files, and anything stored on a second internal drive. Note which items are irreplaceable and which can be downloaded or recreated. This separates backup priorities from software reinstall tasks.
Record the computer's exact model and operating system edition. Include the applications whose installation or licensing would otherwise be difficult to reconstruct. Do not place license secrets and account passwords in an unsecured inventory. A list of what you need is useful without becoming a complete collection of sensitive access information.
2. Verify a backup rather than assuming one exists
Open your backup tool and check its last successful run. Restore a harmless test file to another folder, then open it. A backup status screen and a successful restore answer different questions: one says a process ran, while the other demonstrates that you can retrieve usable data.
Check whether the backup includes the locations in your inventory. A tool can be working perfectly while ignoring a project saved outside its selected folders. Also establish whether a cloud folder is merely synchronized or has versioned recovery appropriate to your needs. Synchronization alone may propagate an accidental deletion.
3. Keep encryption recovery information independent
If device encryption or BitLocker protects the computer, identify the supported location of its recovery key. Verify that you can reach that location without relying on the locked computer. Do not wait for a recovery screen to discover that the only account session capable of showing the key exists on that same device.
Store recovery information securely and limit who can access it. For a work or school device, the organization may manage the key and recovery process. Record the appropriate support route instead of copying organizational secrets into personal storage. The objective is authorized recovery, not bypassing the controls protecting the data.
4. Understand the recovery options by consequence
Microsoft's Windows recovery overview explains several options whose availability depends on the version and situation. A startup repair, a restore operation, a reset, and a clean reinstallation do not have identical effects. Read what the selected operation changes before confirming it.
Do not assume that an option named “restore” always preserves every personal file. Keep your backup independent of operating-system recovery features. When preparing the plan, write a simple rule: recover important data first where possible, identify the symptom, then choose the least disruptive applicable procedure with understood consequences.
5. Prepare media from a trusted source
If a recovery drive or installation USB is appropriate, create it using the supported Microsoft or device-manufacturer process. Check the required USB capacity and read the warning about existing contents before choosing the target. Media creation can erase the selected USB drive, so use one whose contents you have deliberately protected or discarded.
Label the completed device with its purpose and creation date. Keep the instructions for the exact computer's boot menu available separately. Creating media is not permission to reinstall Windows immediately; its value is having a known source available if you later need it.
6. Check the plan without triggering a reinstall
You can verify the media files, the documentation, and the boot-menu instructions without beginning a destructive installation. If you test booting, follow the supported procedure and stop before any partition, reset, or installation action. Avoid changing persistent firmware security settings merely to perform a casual check.
Confirm that your second device can read the recovery note and access the relevant support pages. That might be a phone or another computer. Keep a printed summary if internet access itself could be unavailable. The note should remain useful when the main machine and its saved browser tabs are gone.
7. Write a short decision-oriented note
Include the model, backup location, recovery-key access route, media location, and important support contact. Add the date of the last test restore. Keep secrets in their protected storage; the note can explain where they are without containing them directly.
Describe a few boundaries in plain language. For example: do not erase a disk until the backup has been checked; do not reinstall onto an unidentified drive; contact the administrator for a managed device. These instructions address concrete recovery decisions and reduce the chance that panic turns a startup problem into data loss.
8. Refresh the plan when the setup changes
Revisit the inventory after adding a drive, changing your primary account, replacing backup software, or moving major project folders. A plan built for last year's configuration can become misleading even though every individual step once worked.
The useful test is whether you could explain the recovery sequence to yourself from another device. If you know what data is protected, where recovery access lives, and which operations have destructive consequences, you are substantially better prepared. You do not need to perform a full disaster exercise every week; you need a current, understandable path back to your work.