Most awkward video-call problems are easier to fix before anyone is waiting. The wrong microphone, a camera permission, an unstable connection, or a screen-sharing surprise can each derail an otherwise simple meeting. A short preflight check is more effective than buying new equipment whenever a call goes badly.
Use the same application, computer, headset, and connection that you intend to use in the meeting. A microphone working in a different app is helpful evidence, but it does not prove that the meeting app has selected the same device or has permission to access it.
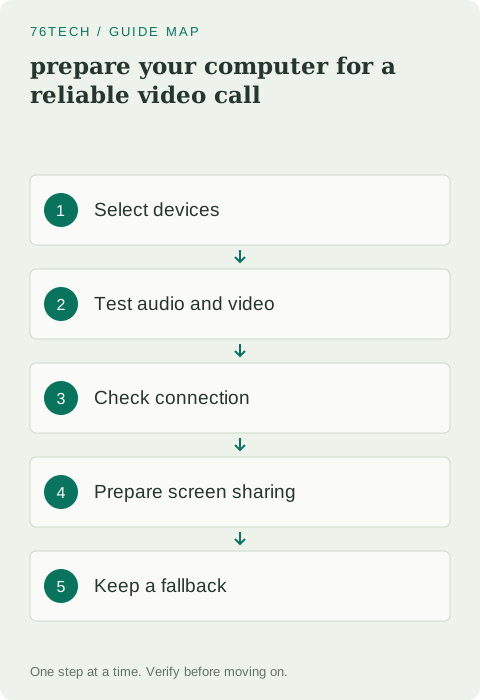
1. Select devices explicitly
Open the meeting application's audio and video settings. Choose the intended microphone, speaker or headset, and camera by name. A laptop connected to a monitor or dock may expose several audio devices, and the default can change after reconnecting accessories.
Speak at a normal volume and watch the microphone meter. Play the application's test sound if available. Google Meet's pre-meeting device check is one example of a supported self-check. Use the equivalent feature in your chosen application rather than relying solely on the operating system's general sound settings.
2. Check the sound path, not just the microphone
If you cannot hear the test sound, inspect the selected output, physical volume controls, and mute buttons. If others cannot hear you, check the application's mute state, the headset's mute control, and the selected input. These are separate controls and can disagree.
Use headphones when practical to reduce the chance that speaker audio feeds back into the microphone. If you join the same meeting from two devices in one room, mute or disconnect audio on one of them. Otherwise, you can create echo even though each device works correctly on its own.
3. Confirm camera access and framing
Check the physical privacy shutter or camera switch, then inspect the preview. Make sure the intended camera is selected and that another application is not using it in a conflicting way. Browser-based meetings may require both operating-system permission and site permission.
Google's camera troubleshooting guidance describes checking the camera, permissions, and competing applications. Grant access only to the meeting application or site you intend to use. Position the camera so your face is visible and avoid a bright window directly behind you if it makes the image difficult to see.
4. Make the network test realistic
Join from the location where you will actually sit. A speed test beside the router does not describe Wi-Fi at the far end of the home. Check whether another device is performing a large upload or download, and pause nonessential transfers you control during an important call.
If available, a stable wired connection can remove wireless coverage as a variable. Avoid changing router settings immediately before a meeting unless you understand the consequences. If a work VPN is required, keep the approved configuration and ask support about persistent quality issues rather than bypassing organizational requirements.
5. Reduce avoidable computer load
Close applications you do not need, especially those actively rendering, compiling, or processing large files. Save work first. A video call competes for processor, graphics, memory, and network resources, so an overloaded computer can produce poor quality even on a good internet connection.
Plug in a laptop if the meeting will be long and place it on a surface that leaves vents clear. Do not start a system update or a major application installation a minute before joining. If the meeting application needs an update, complete it with enough time to reopen the app and repeat the device check.
6. Prepare screen sharing before the audience arrives
Open the document or application you plan to present. Close unrelated windows and review notification settings so private messages do not appear unexpectedly. Know the difference between sharing one tab, one application window, and an entire screen.
If you need to share audio, check the application's supported sharing mode. Audio sharing behavior varies by browser and operating system. Test with a colleague or the application's available preview before an important presentation. Do not assume that because you can hear a video locally, other participants will hear it through the share.
7. Keep a modest fallback plan
Have the meeting link and any required dial-in information available through an independent route. If your main computer fails, a phone may provide a temporary audio connection, but consider mobile data availability and the meeting's access requirements in advance.
When quality drops during a call, make a small, understandable change: stop an unnecessary screen share, turn off your camera temporarily, or switch to a known-good audio device. Tell participants briefly what you are doing. Avoid repeatedly leaving and rejoining while changing several settings at once, because you lose both context and useful troubleshooting evidence.
8. Diagnose recurring problems after the meeting
Write down the symptom and timing: microphone disappears after docking, camera fails only in one browser, or audio breaks up when an upload starts. Compare that pattern with the application's official help, such as Meet's quality troubleshooting guidance.
Repeat a short test under similar conditions and change one variable at a time. If a direct headset connection works but the docked connection fails, you have a focused lead. The goal is a dependable routine you can repeat before every important call: select, test, prepare, and keep one fallback. That habit usually contributes more to a smooth meeting than another last-minute settings overhaul.